Another whole week until February 23, which means there is still time to sew a tie in the Italian style as a gift to a beloved man.

Today we will take a detailed look at all the steps for creating a seven folds tie. A seven-fold tie is a traditional Italian variety of ties that is gaining popularity today among handmade lovers.
90% tie in seven additions is created manually. Its ends can be treated with a lining, or can be without it - today we will consider just such an option. The peculiarity of such a tie is that it does not require duplication; it duplicates itself due to several folds. The fabric can be of any natural composition, but not very thin. Silk and wool jacquard, cotton and medium density linen, mixed fabrics are suitable. I decided to use a woolen suit fabric with a matting weave.
DIY silk tie
You will need:
- fabric 90 cm;
- Whatman paper for making patterns;
- a long ruler;
- a pencil;
- paper scissors;
- embroidery threads of a contrasting color;
- 2 small flat buttons (mother-of-pearl is perfect);
- tailor pins, scissors for fabric, thread, needle.
Making patterns

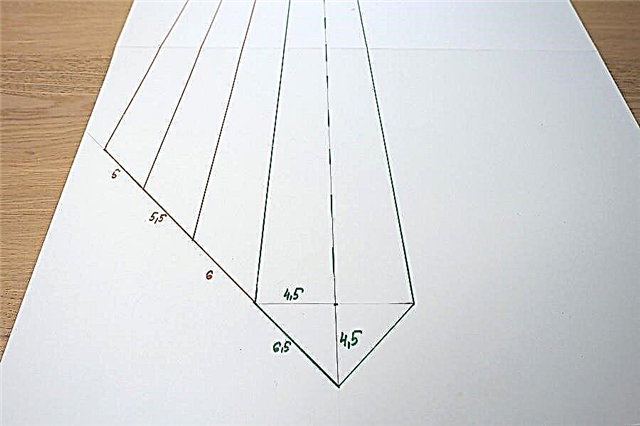
We will make a full-size tie drawing (in the photo a reduced drawing).
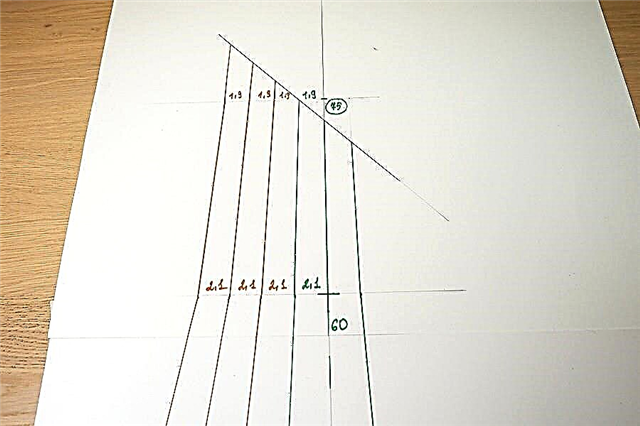
Draw a center line - a vertical line 75 cm long.
At a height of 4.5 cm, 60 cm and 75 cm, draw perpendiculars.
On the perpendicular located at a height of 4.5 cm, measure 4.5 cm in each direction from the center.
According to the perpendicular located at a height of 60 cm, measure 2.1 cm in each direction from the center.
On the perpendicular located at a height of 75 cm, measure 1.9 cm in each direction from the center.
Connect the obtained points, draw a corner of the tie.
In a similar way, draw a narrow part of the tie: length 75 cm, corner 4.2 cm wide and 2.1 cm high.
The junction of the parts outline the lines at an angle of 45 degrees.
This will look like a finished tie.

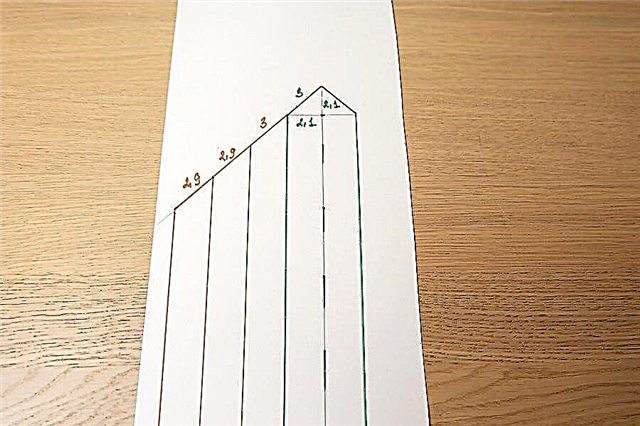
Now you need to draw all the folds of the tie.
To do this, we extend the rays of the lower and upper corners.
On the obtained lines, note the segments. On the rays of the angle of the wide part of the tie: 6 cm, 5.5 cm and 5 cm.
On the rays of the angle of the narrow part of the tie: 3 cm, 2.9 cm and 2.9 cm.
On the perpendicular located at a height of 60 cm, measure three segments 2.1 cm long in each direction from the center.
According to the perpendicular located at a height of 75 cm, in each direction from the center, measure three lengths of 1.9 cm.
Connect the resulting points as shown in the drawing.

It remains to mark the allowances for hemming the corners of the wide and narrow parts of the tie.

Draw an allowance for the corner of the wide part of the tie 1.5 cm wide, on the sides it starts about 15 cm from the bottom.

Draw an allowance for the corner of the narrow part of the tie 1.5 cm wide, on the sides it starts about 7 cm from the top.
Also draw allowances of 1 cm along the oblique cuts for grinding parts.
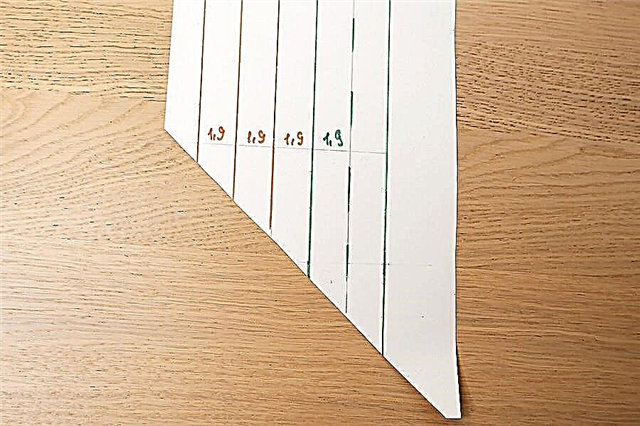


It looks like a life-size tie pattern. For the manufacture of patterns, it is better to take paper denser, for example, whatman paper. So it will be more convenient to use the pattern when cutting.
The pattern is ready, now it can be cut.
Making a tie

Design the fabric and place on it the details of the tie prepared from whatman strictly at an angle of 45 degrees with respect to the shared one.
Clarification:
it will be better if the oblique sections of the parts (the place where the details of the tie are sewn together) are located along the shared one. In the photo, the details are not laid correctly - for the duck. Also pay attention to the location of the strips, if they are on the fabric, the slope of the strips in the finished tie in the classic version should be from left to right.

Cut out the details.

Also cut out on a shared rectangular piece 13 * 4 cm in size.
It will be necessary to make a loop from it to fix the lower part of the tie: grind long sections with an allowance of 1 cm, unscrew and iron. This will result in a belt loop 13 cm long and 1 cm wide.
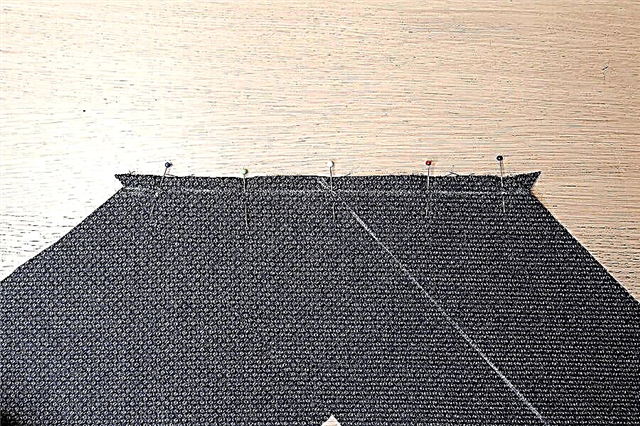
Chip the oblique sections of the tie details face to face.

Lay the stitch 1 cm from the sections and iron the allowances.

Let's start processing the corners of the tie.
Iron side seam allowances 1.5 cm wide on the wrong side.
To make it more convenient to perform this operation, use a thin cardboard (piece of whatman paper) as a template.

Fold open cuts of allowances inward, iron and sweep. The width of the finished stocks is 7 mm.


Iron 1.5 cm of corner allowances as shown in the photo.

Seize and iron too.

On the layout I will show how to beautifully design a corner.
Place the part with the angle up and fold the side allowances twice.
Iron at first the right side of the corner by 1.5 cm, and then the left.

Inside the corner you get such a small square.


The square needs to be carved accurately, as shown in the photo.

And then iron it diagonally.

After that, bend open sections of allowances inward: first allowances on the right side, and then allowances on the left.
The implementation of this operation is better to first work out on breadboard fabric or an unnecessary piece of main fabric.


Hem sewing allowances with hidden stitches, grabbing 1–2 threads of fabric.


When processing corners, be sure to make sure that the angles of the upper and lower parts of the tie are strictly 90 degrees and that the sides of the tie are symmetrical.

Treat the upper and lower parts of the tie in this way.

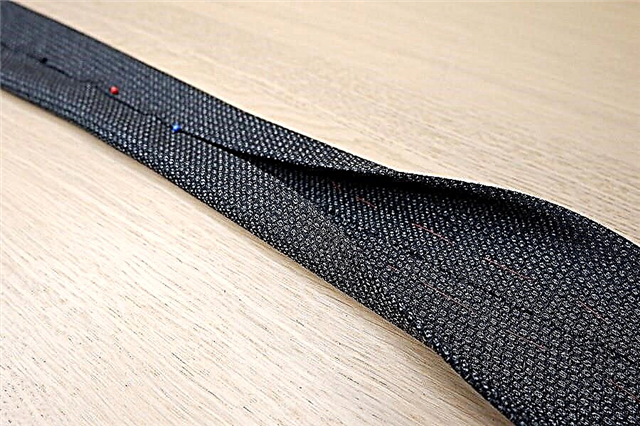
Using a disappearing chalk or a basting stitch, mark the line of the middle of the tie.

Lay the edges of the tie to the center along the entire length, securing with tailor pins.

Bast the edges of the tie over the entire length and iron the folds.
Fold the tie again, again turning its edges to the center. Lock with pins.

The edges of the tie in the center can go on each other by 1 mm.

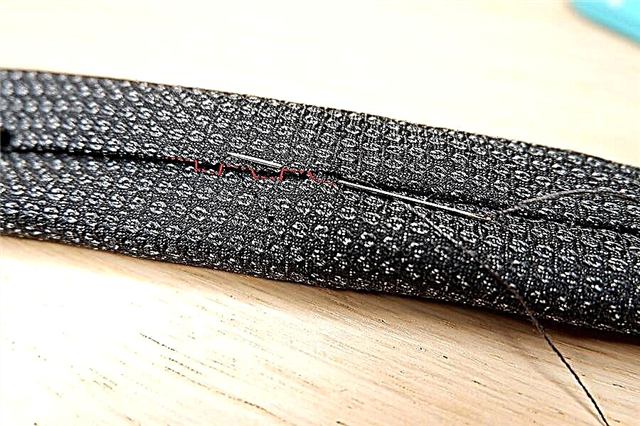
At a distance of ~ 12 cm from the corner of the narrow part, begin to make the main seam of the tie with a sliding seam “forward needle”.

At a distance of ~ 27 cm from the corner of the wide part, fasten the loop to fix the "tail" of the tie. Insert the loops in the seam with open short sections inward, as shown in the photo.

At a distance of ~ 20 cm from the corner of the wide part of the tie, finish the stitching and fasten.

Iron the tie well without stretching it with an iron.
Remove all bobbin threads and iron again.
When performing the WTO, try to bypass the place with the belt loops - there may be lasas on the front side of the tie.
Bindings

Fold the loop-loop in different directions from the seam of the tie and, using the thread for embroidering in a contrasting color, fasten the loop with four small braces.
The width of the belt loop in the finished form should be ~ 5 cm.
If you do not have an embroidery thread, you can use ordinary thread in 2 additions.


At the beginning and end of the stitch, sew the stitches.


Sewing can be done as follows.
Sew a stitch.

Get the needle under the stitch.

Pass the needle into the loop, forming a nodule.

Sew a few of these knots until they cover the entire stitch.

Bindings are ready.
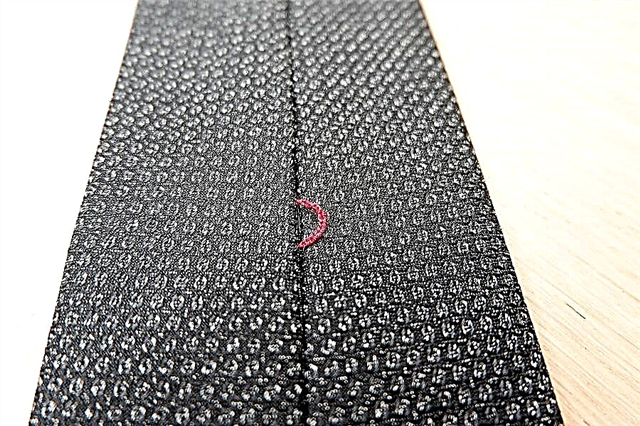
At a distance of ~ 12 cm from the corner of the wide part, make a small loop, as shown in the photo.

Sew a button on the other side on a small thread of leg.


This element is not necessary to perform, but it is better to perform so that the folds of the tie during operation do not diverge to the sides.
Buttons also have a decorative purpose, so that you can open the halves of a tie and admire the folds.

Make loops and sew buttons on the upper and lower ends of the tie (at the lower end of the tie, the buttonhole is about 7 cm from the corner).

Sometimes pendants made of jewelry materials are hidden under the halves of a tie in folds - for the beauty and weighting of the end of a tie.


The tie is ready!
Processing the inner pocket in outer clothing
We sew a vest for drivers with our own hands
Men's vest in 5 days: master class
The author of the master class and photo: Daria Tabatchikova

By education, Daria is a PR specialist and economist, but several years ago she devoted herself entirely to her favorite business - sewing.
She learned to sew from magazines, books and using the Internet, there are also sewing courses in the arsenal, but Daria considers herself to be self-taught. She loves to study specialized sewing literature from different years and countries, and then put her knowledge into practice.
At the end of 2017, Daria became the winner of the festive contest from BurdaStyle.ru.
She leads her Instagram page and VKontakte group.
Material prepared by Julia Dekanova