There is very little time left before the New Year! The festive outfit is already ready, but something is missing? A bright silk flower will add personality to the image and make it unforgettable!

We suggest you make an incredibly beautiful brooch - a fabulous flower made of fabric "Fantasy Winter Orchid". A little zeal, imagination and you will become the star of the New Year's party!
Like from a fairy tale: we decorate the dress with chiffon flowers
You will need:

► White silk (satin, crepe de chine) Size 50x50 cm (or any color, as your imagination orders). It can be any silk scarf with a pattern or cuts from an unnecessary dress. And you will also need a thin fabric in our case - a toe, turquoise
► Glue web;
► Edible gelatin. I prefer Dr. Oetker, it is whiter and the fabric does not turn yellow when processed. This is when it comes to processing white tissue, and so - you can use any other edible gelatin that is at hand;
► Wire for floriculture No. 27 OR 28, which is already covered with paper. We will need white. I purchase it in stores at the Masters Fair;
► Dry pastel (not oil!);
► Wet wipes;
► Fishing line 0.40 mm, white (you can purchase it at any fishing store);
► Threads are light, cotton;
► Corrugated paper, white.
► Veil;
► Ostrich feathers, or any other at your discretion.
► Any beads, bugles, glass beads (4-5 mm).
► Sequins in the form of snowflakes or any other shape (small flower);
► Any beautiful button with rhinestones or stones for the middle of the flower, any diameter;
► Mounting - the basis for the brooch;
► Iron;
► Gauze or any thin tissue (organza) for corrugating petals, size 20x20 cm;
► Thin cardboard for a pattern of petals;
► PVA glue of average fiction;
► Toothpicks;
► Lighter or candle;
► Scissors and wire cutters
Step 1

We take the fishing line, which we previously purchased at the fishing store, and cut it into 5 cm lengths - 9 cuts and 8 cm also 9 cuts.
Step 2

We string the beads chosen by us, beads, sequins, on the fishing line. I do this in two ways:
1. I loop the beads. I cut off the excess with scissors.
2. By firing the edge of the fishing line. Use a candle or a lighter. So that the fishing line melts a little and a small drop forms. Thus, the beads are additionally fixed on the fishing line when we glue it.
Sequins in the form of snowflakes are strung on a fishing line in the following sequence - beads, sequin, beads. We grease each step with PVA glue.
Step 3

Take the wire. Here you will need wire cutters. They cut the wire into segments of 7-8 cm, 6 pcs.
Step 4

We collect the desired bundles. We lay out 3 fishing lines with beads, add ostrich feathers or any others. We twist into tight, arbitrary bunches of thread. And be sure to lubricate the place of twisting with glue using a toothpick. Then we bend the upper edge of the wire so that a hook is obtained. Press it tightly. And again we twist the threads on top. Tied up. We cut off the unnecessary (the edges of the fishing line, thread, feathers), but not so that the fishing line does not pop out.
Step 5

We cut the corrugated paper into a thin strip and wrap our bundles along the oblique, while greasing the paper with glue every time you twist it. Thus, we finally fixed our fancy decor on the wire.
How to make a flower from fabric: a very easy way
Step 6
Now we prepare the fabric - white satin or crepe de chine. But you can use any other colored silk in the future.
Step 7

Now you need to give the fabric stiffness. We will do this with gelatin.
Take a bag of gelatin 10 grams - this is about 2 teaspoons, pour into a glass and fill with 200 ml of cold water. In this case, immediately stir with a fork so that lumps do not form!
Let the gelatin swell (I usually do this beforehand, leaving the gelatin overnight).
Step 8
Then dissolve the gelatin in a water bath, stirring. Once the gelatin has dissolved, pour it into a convenient bowl where you can put our tissue. We do not bring gelatin to a boil! It should be slightly warm.
Step 9

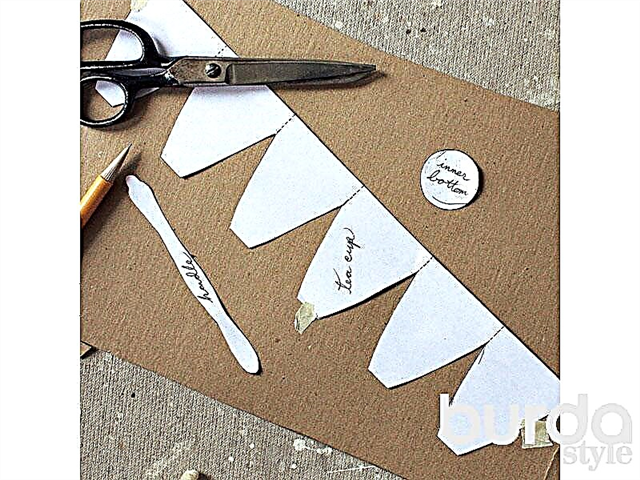
Getting to the pattern. We take a cardboard and completely randomly draw on it with a pencil the petals of two sizes.
A large petal is 10 cm long and 5-6 cm wide.
Small petals 6 cm and 3 cm long in the widest part.
Cut out the petals.
Step 10

We cut out squares from our fabric - 6 pcs, size 10x4 cm and 6 pcs, size 5.5x4 cm.
How to make a flower from cloth
Step 11

On large squares along an oblique glue a wire 13-14 cm long. Next, with the help of an adhesive gossamer and iron, connect the squares.
Step 12

We glue small squares together with a glue web. With an iron. We also cut the cobweb of the desired size - 5x4 cm.
Step 13

We attach our cardboard leaves to the fabric along the oblique and circle with a pencil. Cut out.
Step 14. Toning


Choose the desired pastel color, in our case it is turquoise. We wrap a wet napkin on the index finger and draw a little pastel on the napkin. Then, with your finger, blend it without pressing the petal from the edge to the center of our color.
Step 15. Hot corrugation


Lay out our petals on a slightly damp towel. After they are slightly (!) Moistened, fold each petal in half. Put it in gauze or organza, cover. We heat the iron in the "cotton" mode and iron our petal on top - pressing the iron strongly, with the other hand we pull the petal around the corner of the fabric. In this case, the petal should slowly come out from under the iron. You have to make a little effort and be patient. In this way, a very beautiful corrugation is obtained.
Do-it-yourself brooch "Bottle" of beads and sequins
Step 16

Hands form our petals while they are still warm. We give them the shape of a future flower. After molding the small petals are slightly cut from the top to the middle and with your fingers, we twist the cut edges. The result is an impromptu antennae.
Step 17

Getting to the assembly. We take a beautiful button, thread the wire and fold in half and slightly scroll.
Step 18


Glue shorter bundles with beads and feathers into small petals. Thus, we get fancy stamens. Lubricating with glue, we form them around our button (middle).
Step 19. Improvisation

We lay out the remaining bundles as you like, and glue large sheets. To large leaves, you can glue a sheet of turquoise veil, cutting it obliquely and twisting it in your fingers, thus giving shape. The veil must also be pre-treated with gelatin. This technique allows you to give the product airiness and create the effect of weightlessness. Instead of a veil, you can use any lace, cutting it to the shape of a petal.
Step 20. Processing the underside of the brooch


In order for the reverse side of the brooch to look aesthetically pleasing, a gluing or sepal is necessary. To do this, cut out a circle from satin with a diameter of 10−12 cm. Also, according to the principle of the square, glue it with a cobweb. It will be a good frame for our brooch. Cut it in the shape of a sepal flower. We form by hands, twisting the edges to give a more natural shape to the edges of the sepals.
Do-it-yourself white camellia Chanel from silk
Step 21

Glue our base for the brooch. We fix with a glue gun. Or glue a crystal moment.
Step 22

Our brooch is ready!
Happy New Year!
The author of the master class and photo: Marina Nagorskaya

Marina is a designer of silk accessories. Her path to creating flowers from silk with her own hands was a long one. Working as a hairdresser, Marina liked to create wedding images.Then the idea came to decorate the hairstyles of clients with bright accessories. Once in the world of flowering, Marina wholeheartedly fell in love with this art form. Now this is her world! For more than 7 years she has been creating amazing flowers from silk fabrics and wedding accessories.
Marina draws inspiration everywhere and even in a dream! She can wake up in the middle of the night and immediately sketch the idea she had in her dream in a notebook, which is always next to her.
"Decorate yourself, because beauty inspires us!"
You can get acquainted with Marina’s incredible works on her Instagram page and at the Masters Fair.
Material prepared by: Julia Dekanova